Table of Contents
New to Flutter? Don’t Miss Our Ultimate Guide for Beginners!https://coderaspire.com/what-is-flutter/
Introduction to Flutter Testing
In the realm of Flutter programming, unit testing is a super hero, assuring the dependability and accuracy of your code. It’s time to explore the fun world of Flutter testing if you want to control the power of error-free apps! We’ll provide you all the tools you need to master unit testing in this blog. Together, let’s ascend to new heights!
When creating Flutter production level apps, flutter testing is a crucial idea. The more features your Application has, the more challenging it is to manually test each one. Complex projects must thus undergo automated testing in order to find issues before going live. We will discuss most commonly used design effective testing for your apps under this section. Unit test, Widget test, and Integration tests make up the majority of automated testing.
Typically, Every organization does two different kinds of tests in Flutter Testing :
Unit Test for production :
Since problems are likely to arise when changing data around, such as converting a JSON file into an object.
Integration test for production :
Consider the scenario where you updated the Application and want to publish it in the play store, but you missed to switch your environment to production. Because of this, certain important integration tests check that your app builds appropriately for the environment you’re attempting to deploy it to.
Types of Testing in Flutter -:
Unit testing in flutter :
The goal of unit tests is to test individual classes, methods, and functions. The primary objective is to confirm that the feature being tested is accurate under diverse circumstances. It often has minimal dependencies, is inexpensive to maintain.
Integration testing in flutter :
In most cases, Integration tests test the entire application or a sizable portion of it. To ensure that all services and widgets function as intended, it checks the interactions between various components. Testing if the application builds properly, for instance, would be an integration test. In addition to being slower than the preceding tests, it has a high maintenance cost and many dependencies.
Widget testing in flutter :
Widget tests are tests that examine a particular widget’s interactions with the user. Compared to unit tests, it has a better level of confidence but a high maintenance cost. They might have a lot of dependencies even though they run efficiently.
Now we will learn in detail about testing :
1. Unit testing: What is it?
In Flutter, unit testing is the process of checking individual pieces of code, such as functions, methods, or classes, to make sure they work as intended. Unit testing is essential to the development of superhero apps because it finds flaws early and maintains high quality.
2. Establishing Your Unit Testing Environment
You must establish a reliable testing environment before starting your unit testing adventure. Be at ease! It’s as simple as putting on a cape. The main package you require is called “flutter_test,” and it is included with every new Flutter project.
Check your pubspec.yaml file for the “flutter_test” package in the requirements section to make sure you have the appropriate abilities. Add it if you don’t see it, then save the document. The package will then be downloaded and installed once you run the “flutter pub get” command in your IDE or terminal. You are now prepared to take off!
3. The Composition of a Unit Test
You must comprehend the setup, execution, and assertions of unit testing in order to master it. We’ll be your dependable sidekick and help you through each stage, so don’t be concerned.
Setup:
The stage is set for your test during the setup step. Imagine it as putting on your superhero costume before taking on the villains. In this section, you’ll construct class instances, set up any necessary dependencies, and initialize variables.
Let’s use the function that adds two numbers as an illustration.
int sum(int a, int b) {
return a + b;
}
We must import the testing package, construct a test function, and configure a unit test for this function:
import 'package:flutter_test/flutter_test.dart';

void main() {
  test('Adding two numbers', () {
    // Setup
    int a = 3;
    int b = 5;

    // Execution
    int result = sum(a, b);

    // Assertions
    expect(result, 8); // We expect the sum of 3 and 5 to be 8
  });
}
The test is defined as a string and an anonymous function that contains the test logic in the test function. We set the required variables a and b with the required values for the test inside the test method.
Execution: Running the code you want to test is part of the execution phase. For a unit test, this usually entails calling a function or method with particular inputs and recording the result.
We use the prepared inputs to execute the sum function, as in the previous example, and then store the outcome in a variable. The output can then be subjected to assertions to ensure that it exhibits the desired behavior.
Here, we use the inputs a and b to call the sum function, and we then assign the outcome to the result variable. Then, in line with our expectations, we assert using the expect function that the outcome should equal 5.
Assertions: You check if the output corresponds to the anticipated behavior during the assertions phase. You can assert the accuracy of your code using the many assertion mechanisms that Flutter offers.
In our illustration, we assert that the variable’s result is equal to 5 using the expect function. The test will fail if the assertion is false, which shows that the code being tested is not operating as it should.
In this revised illustration, we’ve included an assertion to confirm that the outcome isn’t an even number. We can test several facets of the behavior of the code in a single unit test by chaining together a number of assertions.
4. Developing testable code
Writing testable code is crucial for Flutter’s unit testing process. The goal of testable programming is to make it simple to create effective unit tests. Here are some essential guidelines and methods for building testable Flutter programming.
Single Responsibility Principle (SRP): According to the SRP, a class or function should only have one cause to change. By following this rule, you can make sure that every part of your code is concentrated on carrying out a particular function.
Keep your classes and functions short and to the point while writing testable code. This enables you to isolate particular code units for testing, which makes it simpler to write unit tests with precise expectations.
Consider creating distinct classes for network requests and data parsing if, for instance, your class already handles both. By doing so, you may independently test the data parsing logic without depending on network requests, resulting in unit tests that are more concentrated and efficient.
Dependency Injection (DI) is a design paradigm that encourages loose coupling and makes testing simpler. Dependencies aren’t formed internally in DI; instead, they are given to a class or function from outside sources.
You may quickly switch out real dependencies with test duplicates or mocks during unit testing by utilizing DI in your code. As a result, you can isolate the code being tested and concentrate on particular behaviors without worrying about how the dependencies are actually implemented.
In Flutter, you may manage dependencies and make dependency injection easier in your code by using DI frameworks like get_it or kiwi.
Here is an illustration of dependency injection using get_it:
Separation of Concerns: The Separation of Concerns (SoC) principle recommends breaking up your code into separate, self-contained components, each of which is in charge of a certain functionality.
It’s crucial to effectively divide concerns while developing testable code, making sure that each component has a clear understanding of its role. You can test each component independently thanks to this separation, which makes it simpler to find and fix problems.
For instance, you can use the Model-View-ViewModel (MVVM) architecture pattern in a Flutter app to separate UI-related code from business logic. As the ViewModel houses the business logic and the View is responsible for UI-related activities, this enables you to test the ViewModel separately.
You can create unit tests for particular components using the SoC methodology without testing the complete system. This granularity enables testing that is quicker and more targeted, increasing the overall effectiveness of your testing procedure.
Test-Driven Development (TDD) is a development methodology in which tests are created ahead of implementation code. This procedure makes sure that the code is testable right away and aids in determining how the code should be designed.
Prior to developing the implementation code, TDD requires you to define the desired behavior of your code using unit tests. By following this method, you can be confident that your code is developed with testability in mind, which leads to code that is better designed and more testable.
In order to illustrate the intended behavior of a new feature, for instance, you might begin by building a unit test that fails. The implementation code is then gradually built up until the test passes.
By using TDD, you can create a thorough set of unit tests that guarantee your implementation is proper and offer high code coverage.
5. Testing Methods and Functions
Testing functions and methods is a crucial part of unit testing in Flutter for ensuring that your code is valid. This section will examine the creation of efficient Flutter unit tests for methods and functions.
Writing unit tests for functions involves isolating and testing each individual piece of code. Here is an illustration of how to use the flutter_test package to create unit tests for a function in Flutter:
import 'package:flutter_test/flutter_test.dart';

int sum(int a, int b) {
  return a + b;
}

void main() {
  test('Adding two numbers', () {
    // Setup
    int a = 3;
    int b = 5;

    // Execution
    int result = sum(a, b);

    // Assertions
    expect(result, 8); // We expect the sum of 3 and 5 to be 8
  });
}
In this case, we have a straightforward sum function that takes two integer parameters and outputs the sum of those two numbers. To define a test case, we use the test function from the flutter_test package. We make claims about the expected behavior of the sum function within the test case using the expect function.
We can confirm the accuracy of the function by using the expect function to compare the actual result of the function call with the expected value.
Writing unit tests for methods involves evaluating each individual method in a class. Here is an illustration of a unit test you may create in Flutter for a method:
class MyMathUtils {
  int sum(int a, int b) {
    return a + b;
  }
}

void main() {
  test('Adding two numbers', () {
    // Setup
    MyMathUtils mathUtils = MyMathUtils();
    int a = 3;
    int b = 5;

    // Execution
    int result = mathUtils.sum(a, b);

    // Assertions
    expect(result, 8); // We expect the sum of 3 and 5 to be 8
  });
}
This example uses the MyMathUtils class, which has an addition method called sum. To test the class’s behavior, we construct a class instance inside the test case and call the sum function.
You can make sure that every method in your class behaves appropriately and independently by developing unit tests for the methods.
Handling Dependencies in Function and Method Testing: It’s critical to manage dependencies correctly when writing unit tests for functions and methods. Other functions, methods, classes, or external services that the function or method depends on are examples of dependencies.
In unit tests, addressing dependencies can be done in a variety of ways:
Mocking:
To substitute actual dependencies with predetermined behavior, use test duplicates or mocks. This enables you to separate the code being tested and concentrate on particular behaviors without depending on how the dependencies are really implemented.
Injecting dependencies into a function or method as parameters is known as dependency injection. This enables greater control and testability by allowing you to offer many implementations or mocks during testing.
Implementations tailored to tests: Make dependencies that give predictable behavior test-specific implementations. To guarantee uniform and regulated testing circumstances, their implementations can be customized.
The complexity and type of your code will determine the technique you take. You can make sure that your unit tests are accurate and focused by managing dependencies correctly.
6. Flutter Testing UI and widgets
Testing widgets and the user interface is an essential part of Flutter development if you want to make sure your app is reliable and of high quality. You can use the widget tests you create in this section to validate the functionality and aesthetics of your UI components.
Writing widget tests in Flutter involves checking the appearance and functionality of UI elements. These tests provide you the chance to mimic user interactions, confirm anticipated results, and make sure your widgets are working properly.
To better understand how to create widget tests in Flutter, let’s look at an example:
In this illustration, we create a widget test to validate the button-tapping behavior. Following is a breakdown of the steps:
Create the Widget:
To create the widget we wish to test, we utilize the await tester.pumpWidget method. In this instance, the home screen of the MaterialApp is an ElevatedButton.
mimic Button Tap: In order to mimic a button tap, await tester.tap is used, along with a Finder to identify the button. In this illustration, the button is located by its text using find.text(‘Button’).
Refresh the widget: In order to refresh the widget and let any triggered state changes or UI adjustments take effect after the button has been tapped, we execute await tester.pump().
Verify the Result: Lastly, we assert the anticipated result using the expect function. In this instance, we anticipate that find.text(‘Button tapped!’) will return the text “Button tapped!”. If the widget reacts to the button tap correctly, the test will pass.
You may utilize widget tests to validate UI changes, simulate user interactions, and check that UI components behave as intended. You may assert certain UI parts or properties, test intricate widget hierarchies, and deal with various widget states.
7. Mocking Dependencies
You could run into situations when building unit tests for Flutter widgets where you need to manage dependencies like services, data sources, or external APIs. It’s usual practice to simulate these dependencies in order to ensure successful testing and isolate the widget under test. We’ll look at how to simulate dependencies in Flutter widget tests in this section.
How come Mock Dependencies?
You can use fake objects that have specified behavior in place of genuine implementations by mocking dependencies. By doing this, you may regulate the answers, model several possible outcomes, and separate the widget under test from its actual dependencies.
The need for mocking dependencies is demonstrated by the following scenario:
Let’s say you have a widget that displays user data that it receives from an API service. You should test this widget under a variety of conditions, such as successful API responses, error responses, and network difficulties. You can replicate these situations without depending on the network or server responses by mocking the API service.
Mocking Dependencies using Mockito:
With Mockito, you may build mock objects and specify their behaviour. Mockito is a commonly used mocking framework in Dart and Flutter. It offers a straightforward and expressive API for building mocks, establishing expectations, and confirming interactions.
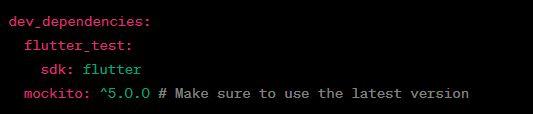
You must include the mockito package as a dev dependency in your pubspec.yaml file in order to mock dependencies in your Flutter widget tests:
When the package has been added, you can simulate dependencies in your widget tests. Here’s an illustration:

Here, we extend the Mock class from the mockito package to build a mock object called MockapiService. Then, by defining what the mock should return when its fetchData method is called and utilizing the when function, we establish the intended behavior of the mock.
The widget under test is given the mock apiService inside the widget test, which takes the place of the real apiService. This enables us to regulate the ApiService’s behavior during testing.
To create expectations and validate interactions with mock objects, Mockito offers a number of functions including when, thenReturn, thenAnswer, and verify.
8. TDD, or test-driven development
A software development methodology called Test-Driven Development (TDD) places a strong emphasis on building tests before producing actual code. In a process known as “Red-Green-Refactor,” developers first write a failing test, then write the bare minimum of code necessary to pass the test, and lastly modify the code to improve its architecture while keeping all tests passing.
TDD’s popularity has grown as a result of its capacity to raise code quality, promote better design, and function as a safety net for reworking. In this section, we’ll examine the TDD tenets and show you how to use Flutter’s TDD framework to develop a feature.
TDD Cycle:
Red: You write a test in the Red phase that represents the intended functionality or behavior you want to implement. Due to the fact that you haven’t yet written any code, this test will initially fail.
Green: You write the bare minimum of code necessary to pass the failed test during the Green phase. The objective at this point is to pass the test; the code does not need to be flawless or optimized.
Refactor: During the Refactor phase, you enhance the structure and design of the code while ensuring that all tests continue to pass. By doing this, the codebase is kept tidy, maintainable, and compliant with best practices.
Example: TDD is used to implement a feature.
Let’s go over an example to see how Flutter handles TDD. Let’s say we want to add a basic login functionality that includes a login button and fields for entering a username and password. Here is a TDD-based strategy for doing it:
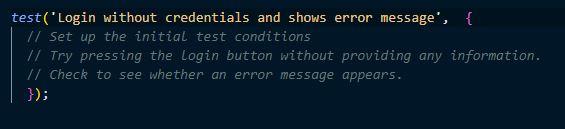
1.Red: To begin, we create a failing test that outlines the desired functionality of the login component. When the login button is pushed without inputting credentials, for instance, we could create a test to confirm the veracity of the error message presented.
2.Green : At this point, we write the bare minimum of code required to pass the test. In this instance, we’ll change the logic for logging in so that it displays an error message when the login button is pushed without the proper credentials.
void login() {
if (username.isEmpty || password.isEmpty) {
// Display error message
} else {
// Perform the logic of login
}Refactor:
Now that the test has passed, we can rewrite the code to make it more readable, maintainable, and well-designed. For instance, we can improve the user interface, add error handling, or extract the login logic into a different function.
The TDD cycle ensures that tests support our code at all times and that each line of code we develop has a specific function. TDD helps us find edge cases, stop regressions, and have faith in the behavior and usefulness of our code.
9. Reporting and Test Coverage
The effectiveness and completeness of your unit tests may be evaluated in large part by looking at test coverage and reporting. They aid in determining how much of your codebase is tested and point out areas that need more testing. In this section, we’ll look at a variety of methods and programs for calculating test coverage and producing thorough test coverage reports in Flutter.
Why Test Coverage Matters:
Test coverage is a measure that expresses how much of your tests’ code is covered. It shows how your tests put various components of your codebase to the test. More tested code means more test coverage, which lowers the likelihood of errors going undetected.
Measurement of Test Coverage:
Flutter supports a number of approaches and tools for measuring test coverage. Here are a few typical strategies:
1. Line Coverage:
The percentage of lines of code that are run by your tests is measured by line coverage. It shows how many lines of code are used to execute the test.
2. Branch Coverage:
The percentage of branches or decision points that are covered by your tests is measured by branch coverage. It determines if all potential code branches, including true and false circumstances, have been evaluated.
3.Function/Method Coverage:
The percentage of functions or methods used during test execution is measured by function or method coverage. It ensures that all of the functionalities are tested in your tests.
Making Reports on Code Coverage:
To create code coverage reports in Flutter, you can use a variety of tools and packages. Here are a few well-liked choices:
Lcov:
Lcov is a popular program for creating reports on the code coverage. It gathers coverage information and produces thorough HTML reports that show the metrics for coverage.
Another well-liked code coverage tool, Jacoco, allows for the creation of reports in a variety of forms, including HTML and XML. It offers thorough information about branch coverage, line coverage, and other topics.
CI/CD with Code Coverage Integration:
It is advantageous to incorporate code coverage measurement into your continuous integration and continuous delivery (CI/CD) pipeline to enable continuous test coverage monitoring. You can enforce minimum coverage thresholds and stop code with low coverage from merging into the main branch by including coverage checks in your build process.
Example: If your function sorts a list of numbers, you can create tests to handle edge cases like empty lists, lists with only one element, and lists with elements that have already been sorted. This guarantees that your sorting algorithm appropriately handles these specific instances.
10. Advanced Testing Methodologies
With Flutter, unit testing extends beyond the fundamentals, and you can use cutting-edge methods and approaches to improve the efficacy and efficiency of your tests. This section will look at some sophisticated testing methods that can up your unit testing game.
- Data-driven testing and parameterized tests: With parameterized tests, you may run the same test logic with various input data sets. When you wish to evaluate several scenarios or input combinations without writing repetitious test cases, this technique can be helpful. You can ensure thorough coverage and make test maintenance simpler by supplying test data in a structured manner.
Let’s use an example where your function computes a value based on two input numbers. Use parameterized tests to test many input combinations in a single test case rather than writing numerous separate test cases for distinct number combinations. - Testing Error Handling with Exceptions: Testing the error handling behavior of your code is necessary to verify robustness. Error handling is a crucial component of app development. You can create tests to ensure that your code manages and throws expected exceptions in a variety of situations. By using this technique, you can find potential problems with error handling and make sure that your app responds to errors in the way you intend it to.
Consider, for instance, a function that executes a network request and responds to potential network failures. You can create tests to ensure that the function gracefully handles network problems and throws the expected exceptions when they occur. - Utilizing Test Fixtures for Setup and Teardown :
Test fixtures are used to create the necessary testing environments and to tear them down later. Before running tests, they offer a practical approach to initialize objects, set up dependencies, or carry out any required setup. Test fixtures contribute to the upkeep of test independence while minimizing duplication of code and enhancing test readability.
Consider the following scenario: You have a set of tests that demand a particular setup or database connection. Use test fixtures to describe the setup logic once and reuse it across numerous tests rather than duplicating it in each test.
- Testing Boundary Conditions and Edge Cases: The extremes or boundaries of the input or output range of your code are referred to as edge cases and boundary conditions. To guarantee your code handles these situations effectively, you should frequently pay extra attention to them and conduct comprehensive testing. You may find possible problems and improve the robustness of your software by particularly developing test cases to handle these edge circumstances.
Example: If your function sorts a list of numbers, you can create tests to handle edge cases like empty lists, lists with only one element, and lists with elements that have already been sorted. This guarantees that your sorting algorithm appropriately handles these specific instances. - Test Doubles and Test Spies: In your tests, test doubles are substitutes for actual dependencies in the form of objects or components. They give you the ability to regulate dependencies’ actions and replicate particular scenarios for testing. Test doubles, which can be used to isolate and test your code, include mocks, stubs, fakes, and spies.
Consider a class that is dependent on a database service. You can simulate multiple database answers or test particular error scenarios by building a test duplicate, such as a fake database service, to make sure your code behaves as intended under various circumstances.
These advanced testing methods offer extra tools and approaches for creating unit tests that are more thorough and efficient. You may improve the coverage, dependability, and maintainability of your Flutter apps by including these strategies into your testing strategy.
11. Best Practices for Flutter Unit Testing
Unit testing is a crucial component of software development, and by adhering to best practices, you may significantly increase the efficacy and worth of your tests. In order to assist you in creating high-quality, manageable, and dependable tests for Flutter, this section will outline some best practices for unit testing.
It is essential to write tests that are separate from one another and independent of one another. Instead than relying on the setup or state of other tests, each test should concentrate on a particular functionality or behavior. Isolated tests make it easier to debug and maintain systems by ensuring that errors or modifications in one test do not affect the outcomes of others.
Use Meaningful and Descriptive Test titles:
Effective test titles help students comprehend the test’s objective and expected conduct. Use titles that are evocative of the scenario being tested and the desired result. As a result, test failures are simpler to comprehend, and the root cause of failures can be found more rapidly.
Keep Tests Brief and Easy: Make an effort to keep your tests brief and precise. Long and complicated assessments can be challenging to keep and comprehend. Divide complicated cases into smaller, easier-to-manage tests. Shorter tests also execute more quickly, allowing you to iterate and receive feedback more quickly when developing.
Follow the AAA Pattern (arrange-act-assert):
Using the AAA pattern to structure your tests makes them clearer and easier to interpret. The Arrange step prepares the environment for the test, the Act step executes the operation under test, and the Assert step validates the anticipated result. This structure aids in organizing and comprehending the test’s flow.
Test both optimistic and pessimistic scenarios Make sure both positive and negative events are covered in your tests. While negative tests examine how your code responds to unexpected or incorrect inputs or conditions, positive tests verify that the expected behavior operates as predicted. In order to find potential edge situations and strengthen the resilience of your code, it is helpful to test negative scenarios.
Refactor frequently and maintain your tests with your codebase. Treat your tests like first-class citizens. Refactor tests so that they continue to match the evolving functionality or behavior of your code. To ensure that your tests appropriately reflect the most recent implementation and offer trustworthy feedback, regularly evaluate and update them.
Place a high priority on test coverage: Strive for thorough test coverage to guarantee that vital components of your codebase have been thoroughly tested. Test crucial or difficult functionality, error handling, and edge cases in order of importance. Focus on useful and high-quality tests rather than merely doing a large number of tests, but keep in mind that 100% test coverage does not ensure bug-free code.
Automate testing and run tests frequently:
Make testing a frequent component of your development process. To identify problems early, run your tests regularly, ideally after each modification to the code. Test automation can help you save time and effort. In order to provide quick feedback and guarantee code stability, continuous integration (CI) systems can automatically run tests on each commit or pull request.
Utilize the principles of test-driven development (TDD):
Consider utilizing the principles of Test-Driven Development (TDD), where tests are written before matching functionality is implemented. TDD promotes a methodical approach to development and aids in creating code that is clearer and more testable.
Review and hone your testing strategy routinely:
Continue to assess and refine your strategy. Take lessons from test failures and apply them to your upcoming exams. To improve your testing talents and stay ahead in the developing field of Flutter development, keep up with latest testing frameworks and methodologies.
You may develop effective unit tests that give useful feedback, enhance the quality of your code, and boost your trust in your Flutter applications by adhering to these best practices.
Conclusion
In order to guarantee the dependability, stability, and quality of your code, unit testing is a crucial step in the development of Flutter applications. This thorough manual covered many facets of Flutter unit testing, such as creating the testing environment, creating tests for various scenarios, simulating dependencies, and learning advanced testing methods.
We started by comprehending the value of unit testing and how it contributes to the development of reliable and maintainable apps. The next step was to set up a Flutter unit testing environment, configure dependencies, and run tests using well-known testing frameworks like flutter_test.
The anatomy of a unit test was then examined, along with its various parts, including setup, assertions, and teardown. In order to make testing easier, we learnt how to write testable code, separate concerns, and use dependency injection techniques.
We covered topics including basic calculating functions, methods with dependencies, and asynchronous functions utilizing mocking approaches as we talked about testing functions and methods. We also looked into user interaction simulation, widget testing, and widget behavior validation.
Another crucial subject was mocking dependencies, which was highlighted for its importance in supporting independent testing and isolating code units. For the purpose of offline testing, we showed how to model objects for external services, test error handling, and simulate network queries.
We went into the fundamentals of Test-Driven Development (TDD), demonstrating how writing tests prior to implementing code encourages a methodical and tested approach to development. We discussed the advantages of TDD and showed you how to use it to develop a feature.
In our discussion of test coverage and reporting, we emphasized the significance of keeping track of test coverage and producing reports to evaluate the caliber and efficacy of your tests. We looked into generating code coverage reports using programs like lcov and Jacoco.
Last but not least, we discussed sophisticated testing strategies like parameterized tests, handling of exceptions, and leveraging test fixtures for setup and teardown. We talked about the best practices for designing isolated tests, utilizing descriptive test names, keeping tests short and simple, and giving test coverage priority when it comes to unit testing in Flutter.
By adhering to these guidelines and include unit testing in your development process, you may increase the quality of your code, find errors sooner, and create more dependable Flutter applications. Consider testing an essential component of your development process, keep up with new testing methodologies, and constantly assess and improve your testing strategy.
Now that you have the information and abilities from this guide, it’s time to advance your Flutter unit testing. Start creating thorough and useful tests for your Flutter applications, and reap the rewards of more confidence, accelerated development, and robuster code. Enjoy your testing!